Trade Tips: Installing Mixer Taps Like a Pro - Step-by-Step Guide
Wednesday 11 February 2026
Installing a mixer tap like a pro in New Zealand is less about clever tricks and more about following a disciplined process; from prep and isolation to pressure checks and final commissioning. This guide walks tradies and experienced DIYers through the exact tools, step-by-step installation, pressure and flow checks, and NZ Building Code considerations so your kitchen and bathroom fixtures perform reliably and stay compliant.
Trade Tips: Installing Mixer Taps Like a Pro - Step-by-Step Guide
Mixer taps sit at the heart of modern plumbing fixtures, blending hot and cold water into a single controlled outlet. Getting the installation right protects the plumbing system, avoids leaks, and ensures kitchens and bathrooms meet New Zealand performance and safety expectations.
This guide is written for tradies and experienced DIYers searching for how to install mixer taps NZ and wanting practical plumber tips for tap installation that work with quality mixer tap fittings from brands like Elementi, Zucchetti.KOS, Grohe and Samuel Heath.
Before you start - legal and safety basics in NZ
In New Zealand, plumbing work is restricted for health and safety reasons. Under current guidance, many forms of sanitary plumbing must be carried out by an authorised or licensed plumber, and unauthorised work can attract fines up to $50,000. Limited tasks such as replacing existing taps on like for like bases may be permitted, but any change that affects sanitary plumbing or potable water supply can fall under restricted work.
Key points:
- Always confirm whether your planned mixer replacement is legally DIY or must be done by a licensed plumber
- Remember that insurers can decline claims if restricted plumbing work has been done by an unlicensed person
- This guide is for educational purposes and does not override New Zealand law or the Plumbers, Gasfitters and Drainlayers Board requirements
If in doubt, involve a certifying plumber and use this as a quality checklist rather than a licence to proceed.
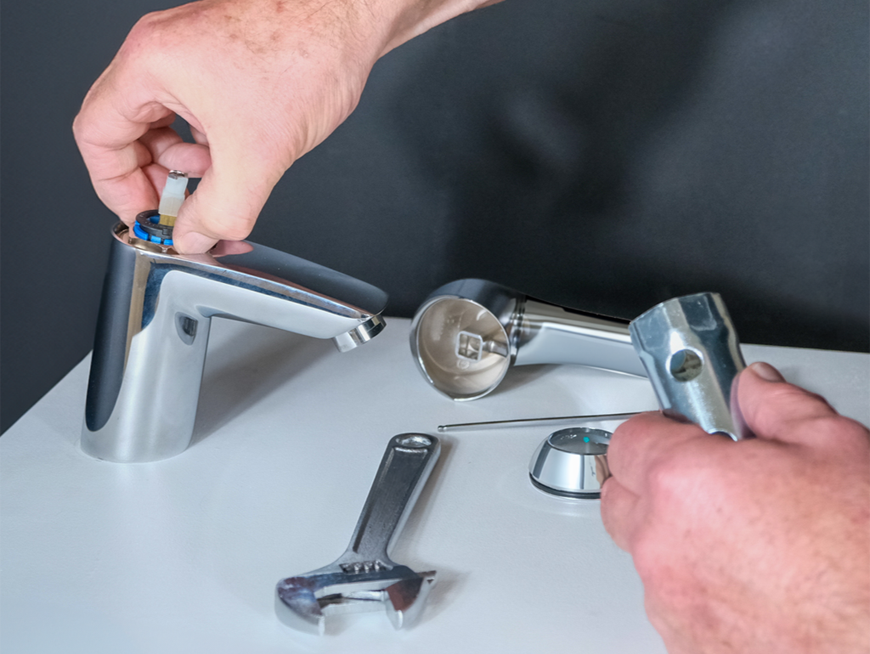
Tools needed for mixer tap installation
Professional-looking results start with having the right tools and consumables ready before you touch the old tap. Installing plumbing fixtures like mixers involves working in tight spaces where using the wrong tool can damage the finish or fittings.
Essential tools:
- Adjustable spanners and/or open-ended spanners sized for the mixer’s connections
- Basin wrench or crowsfoot spanner for hard-to-reach back nuts under basins
- Screwdrivers for retaining plates or brackets
- Plumber’s tape (PTFE) for threaded connections where specified
- Bucket and towels to catch residual water
- Flashlight or headlamp to see behind basins and vanities
- Soft jaw pliers or a cloth wrap to protect chrome or special finishes from jaw marks
Nice to have:
- Small inspection mirror for checking seated seals and connections
- Torque wrench if the manufacturer provides torque values for specific mixer tap fittings
- Level to confirm the mixer body is straight on benchtops or basins
Always read the brand-specific installation manual - for example, Elementi sensor faucets explicitly call for flushing pipes before installation and tightening specific connections in a defined sequence.
Step-by-step installation process
Kitchen and bathroom fixtures share similar principles, but always follow the exact sequence in the brand manual. The steps below describe a typical above-counter mixer tap installation.
1. Isolate and drain the water
- Close the local isolating valves under the basin or sink. If none exist, isolate the main water supply to the dwelling.
- Open the existing tap to relieve pressure and drain residual water into a bucket.
New Zealand’s water supply clauses require that systems are installed to avoid leakage and allow isolation for maintenance, so confirming you have effective isolation is the first professional check.
2. Remove the existing mixer or tap
- Disconnect flexible hoses or copper tails from the supply lines using appropriate spanners
- Undo the mounting nut or bracket that clamps the old mixer to the basin or benchtop
- Lift out the old fitting, taking care not to damage the surface or chip porcelain
Use the removal step to inspect the bench or basin hole for damage and clean away any old silicone or debris that could prevent a good seal for the new mixer.
3. Prepare the mounting surface and seals
- Check that the mounting hole diameter matches the new mixer’s specification
- Dry fit the new mixer and gasket or trim plate to confirm coverage and alignment
- Install any rubber or fibre sealing gaskets supplied by the manufacturer between the mixer base and the surface to prevent water ingress
Kitchen and bathroom fixtures rely on correct sealing to avoid hidden leaks that can cause timber damage and mould.
4. Fit the mixer body and fixing kit
- Feed the mixer’s flexible hoses and threaded stud through the mounting hole
- Position the mixer so the spout and handle are correctly oriented for the client’s preference; Elementi, for example, allows some wall mixers to be installed with the lever up or down depending on the look you want.
- From under the basin, fit the horseshoe plate, washer and mounting nut as per instructions
- Tighten the mounting nut evenly so the mixer sits firm and straight without overtightening and stressing the basin
Check that the mixer does not rotate when operated. A loose mixer is one of the most common callbacks.
5. Connect hot and cold supplies
- Identify hot and cold inlets. In NZ, hot is typically on the left when facing the mixer, but always confirm existing pipework.
- Connect flexible hoses to the correct isolation valves or supply tails using the recommended seals and do not apply PTFE tape to connections that seal on rubber gaskets
- Tighten connections with a spanner but do not overtighten
- Where using threaded adaptors that rely on PTFE tape, wrap tape in the direction of the thread so it does not unravel during tightening
Manufacturers emphasise flushing pipes before final connection to prevent debris damaging cartridges, particularly on more complex models such as electronic or sensor mixers.
6. Restore supply and test operation
- Slowly open the isolation valves or main supply while watching the connections under the basin
- Check for leaks at every joint while the tap is in both off and running positions
- Run the mixer through hot, cold and mixed positions to purge air and debris from the lines
At this point, you should also confirm that the handle movement is smooth and that the outlet aerator or spray pattern is functioning correctly.
Common mistakes and how to avoid them
Even experienced installers occasionally make errors. Knowing the typical failure points saves rework.
Frequent mistakes:
- Skipping isolation or not checking it works - Results in unexpected flooding. Always verify that water has stopped before loosening any plumbing fittings.
- Misidentifying hot and cold - Reversing connections can be a compliance issue and may affect thermostatic safety in some systems. Always check before tightening.
- Overtightening mounting hardware - Can crack ceramic basins or distort stainless steel sinks. Tighten just enough for stability.
- Ignoring manufacturer instructions - Grohe and others explicitly require installation in accordance with their technical information for warranties to apply.
- Failing to flush lines - Debris in pipes can damage ceramic cartridges or block filters, especially on premium mixers and sensor taps.
Being methodical, using the right tools and following brand documentation is what separates trade quality work from guesswork.
Troubleshooting leaks like a pro
Leaks around a newly installed mixer tap usually show up in predictable places and have predictable causes.
Common leak points and fixes:
At the hose to isolation valve joint
- Check that the sealing washer is present and undamaged
- Confirm threads are correctly aligned and not cross-threaded
- Retighten gently and recheck
At the base of the mixer on the benchtop
- Usually indicates insufficient compression on the mounting gasket or missing seal
- Loosen the mounting nut, reseat the gasket or add the supplied sealing ring, and retighten evenly
Under the bench at the mixer body connections
- Inspect for hairline cracks in plastic tails or O-ring misalignment
- If the fitting is damaged, replace rather than attempting to seal with additional tape or compound
G12 Water supplies requires that installations avoid the likelihood of leakage and provide reasonable access to components needing maintenance, so ensure connections are visible and not buried where future inspection is impossible.
If leaks persist despite correct tightening and sealing, replace the suspect component or consult the brand’s technical support via Robertson, especially for Grohe, Elementi, Zucchetti.KOS or Samuel Heath mixers still under warranty.
Pressure and flow rate adjustments
Mixer taps are designed for defined pressure and flow conditions. Installing them outside those parameters can cause noise, poor performance or premature wear.
NZ Building Code G12 requires that water supply systems deliver adequate flow rates for the correct functioning of fixtures and avoid excessive pressure that could cause damage.
Key checks:
- Static pressure - Confirm the incoming pressure at the dwelling is within the mixer’s rated range. Where pressure reducing valves are used, design calculations must treat the available head as the outlet pressure of the valve plus or minus downstream losses.
- Balanced pressure for hot and cold - Many modern mixers, especially European brands, perform best with balanced pressures. Unbalanced systems can cause temperature swings at the outlet.
- Flow limiting devices - Aerators and restrictors fitted to the outlet control flow rate and help meet water efficiency targets. Do not remove or drill out restrictors unless instructions allow it, as this may void warranties and affect compliance.
Manufacturers’ literature must be referenced for pressure and flow information, and fixtures must be appropriate for the available flow and pressure according to G12. For premium kitchen and bathroom fixtures, always check the technical sheet via Robertson before specifying or installing.
Post installation checks and commissioning
Before you pack away tools, run through a structured commissioning checklist.
Checklist:
- Confirm all joints are dry with the mixer in both off and running positions
- Verify correct hot left and cold right orientation at the handle and outlet
- Operate the mixer through full temperature and flow range to check for smooth operation and that the water does not hammer or pulsate
- Inspect under the basin after several minutes of operation to ensure there are no slow weeps at fittings
- For electronic or sensor mixers, test sensor activation, power supplies or batteries as described in the manual and confirm no error indicators are present.
A short written note or photo record of the installation and the pressure conditions at commissioning can also support future warranty claims, for example with Grohe’s manufacturer warranty which requires proof of purchase and proper installation.
Safety compliance and NZ Building Code considerations
Installing mixer taps is not just about making fixtures work. It must also protect potable water quality and user safety.
G12 Water supplies and related Acceptable Solutions require that:
- Water supply systems are installed so there is no likelihood of cross connection between potable and non potable systems or contaminants such as chemicals and heating systems
- Flow rates are adequate for the correct functioning of sanitary fixtures and appliances under normal conditions
- The system avoids leakage and allows maintenance and isolation via appropriate valves
Because mixers are part of the plumbing and potable water system, these clauses apply to both kitchen and bathroom fixtures. Any work involving backflow risk, new pipework or major changes should be handled by authorised practitioners, and local council or PGD Board guidance should always be checked before work proceeds.
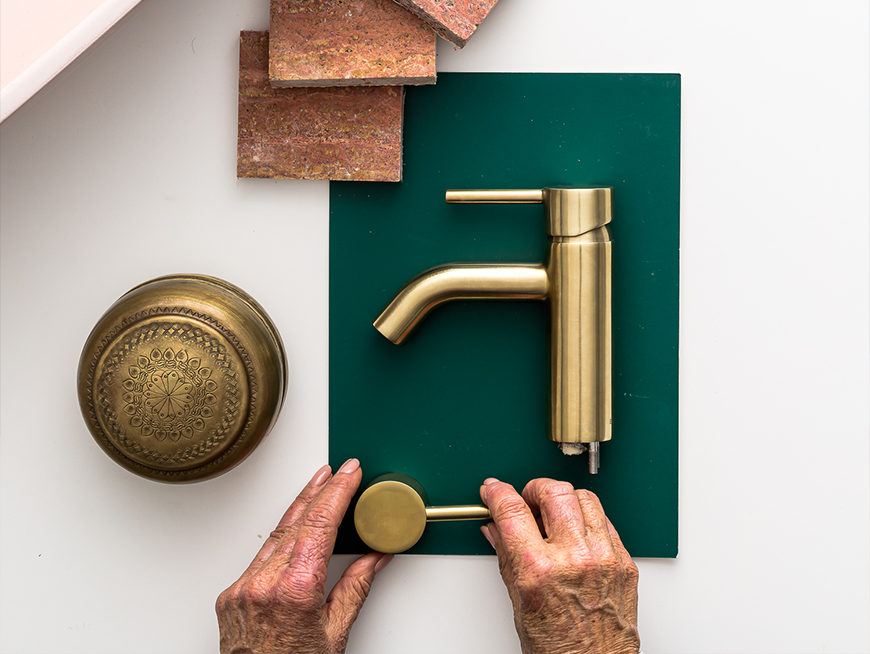
Why choose Robertson brands for trade-grade installations
Using well-engineered mixer tap fittings makes installation smoother and performance more predictable.
- Elementi provides contemporary, often NZ-focused designs and clear installation instructions, including guidance for special models such as sensor faucets and wall-mounted mixers.
- Zucchetti.KOS offers Italian-engineered mixers with carefully designed cartridges and internal waterways that reward correct installation with precise control and long life.
- Grohe couples German engineering with robust manufacturer warranties, provided installation follows their technical data sheets and product information.
- Samuel Heath specialises in finely made brassware where accurate installation and protection of the finish are essential to preserve long-term appearance and performance.
Sourcing through Robertson Bathware ensures access to current technical documents, NZ-specific advice and warranty support for these kitchen and bathroom fixtures.
FAQs - How to install mixer taps NZ
Can I legally install my own mixer tap in New Zealand?
New Zealand treats most sanitary plumbing as restricted work that must be carried out by authorised or licensed plumbers, and significant penalties apply for unlicensed work. Some simple tasks like repairing or replacing taps in kind may be allowed, but you must check current regulations and insurer requirements before starting.
What is a plumbing fixture and where do mixer taps fit in?
A plumbing fixture is a device connected to a plumbing system that provides access to water or waste systems, such as sinks, toilets, baths and showers. Mixer taps are part of kitchen and bathroom fixtures in this category, controlling delivery of potable water at the point of use.
How tight should mixer tap fittings be?
Mixer tap fittings should be tight enough to prevent leaks but not so tight that they damage threads, crush gaskets or crack basins. Manufacturers like Elementi specify tightening sequences and recommend using appropriate tools, sometimes with torque values for certain models.
Why is my new mixer tap leaking at the base?
Leaks at the base are often caused by misaligned or missing gaskets or insufficient compression of the mounting seal. Re seating the mixer with the correct gasket and evenly tightening the fixing kit usually resolves this, provided the body itself is undamaged.
How do I adjust pressure or flow for a new mixer?
You must ensure the supply pressure is within the mixer’s rated limits and that hot and cold pressures are balanced. G12 requires that outlet fixtures are compatible with available flow and pressure and that manufacturer literature is followed when selecting and installing tapware.
Do I need to flush pipes before installing a new mixer?
Yes. Installation manuals for electronic and standard mixers emphasise flushing pipes to remove debris, which could otherwise damage cartridges or block filters in high precision tapware. This step is especially important when installing premium brands like Zucchetti.KOS and Grohe.
How do warranties work for trade-installed mixers?
Manufacturers such as Grohe provide multi-year warranties that apply only if the product is properly installed according to their technical information, and claims require proof of purchase. Buying through Robertson and following brand instructions for Elementi, Zucchetti.KOS, Grohe and Samuel Heath helps protect those warranties.